
Best Practices for connecting the Fusion WiFi system to new or existing access points.
Summary
Fusion WiFi’s Social WiFi login system can be integrated with nearly all pre-existing wireless LANs. Because there’s no requirement to edit or flash firmware on your existing access points we are able to quickly and easily connect our system using industry standard methods with very little disruption.
After applying our configuration script to a Mikrotik router, two network bridges are created; “WAN Bridge” and “Hotspot Bridge”. This means that all the Ethernet ports are configured in switch mode (all ports will operate on your network’s untagged/default VLAN). One of the key benefits of this is if you are installing this unit in an area that is short on available Ethernet ports, the system will act as a switch without the need for any further configuration.
WAN Bridge = Connects to your existing (NAT) network that runs DHCP.
(The WAN connection to the Fusion WiFi router.)
Hotspot Bridge = The Social WiFi Login / Captive Portal network
Each port has VLAN 14 tagged on it. This type of port configuration is sometimes referred to as a “Hybrid Port” – untagged traffic and tagged traffic.
VLAN 14 on each port is a member of the “Hotspot Bridge”.
Connecting your Access Points Directly to the Fusion WiFi router
Most cloud managed access points such as the Ubiquity Unifi range require internet access in order to talk back to their controller, by default this is untagged traffic. If we were to connect an access point directly to the Hotspot Bridge network, the device would have no way of authenticating itself in order to talk back to the controller.
The default SSID of your access point will be on an untagged network, the access point can be physically connected to a port on the Mikrotik router and still have access to your local network and the internet. We always suggest using the default SSID for your staff / private network.
Adding your Free WiFi / Hotspot network
At this point you should have one or more access points physically connected to the Fusion WiFi router with the ability for each of them to talk to your local LAN or the internet.
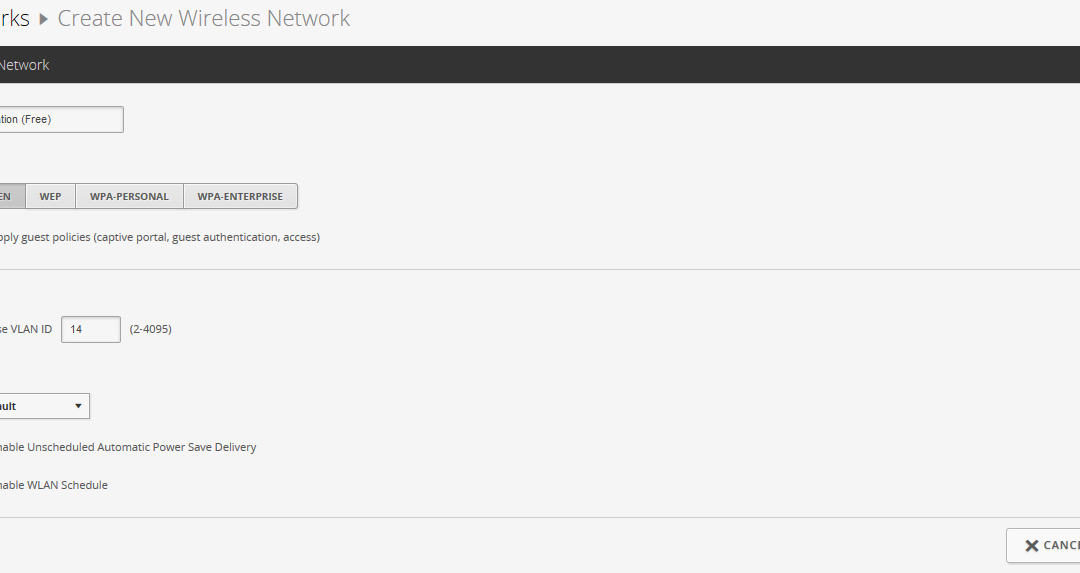
The next step is to create a new SSID on your access point or controller. This SSID will be the one that the location’s guests can connect to. Leave this SSID unencrypted with no password.
Create the SSID and look for the VLAN option, we want to tag this SSID with VLAN 14 (Hotspot Bridge). Because the Fusion WiFi router’s ports are tagged with VLAN 14 no further action is required.
You should now be able to search for and connect to your new SSID. The Fusion WiFi router will be providing IP addresses on this network via DHCP. At this point a splash screen requesting the social login should appear.

Connecting the Fusion WiFi router to a managed wireless network
Prerequisites:
- Access points with VLAN support
- Switch with VLAN support (where applicable)
- 1 available switch port configured in hybrid mode or
- 2 switch ports, one for untagged traffic (internet access for the Fusion WiFi router) and one with VLAN 14 (client network).
Follow these steps to connect the Fusion WiFi router into your existing wireless network:
- Create a new SSID on your wireless controller and give it the VLAN tag value of 14
- Tag VLAN 14 on all of the ports that your access points connect to
- Tag VLAN 14 on the port you wish to connect the Fusion WiFi router to.
(If you are able to set this port in hybrid mode, allowing untagged traffic and VLAN 14 then this will only require a single Ethernet connection to the router).
If you were unable to set your switch port in hybrid mode, connect Ethernet 1 of the Fusion WiFi router to a switch port with untagged network traffic:
- Connect Ethernet 1 of the Fusion WiFi router to the switch port with untagged network traffic
- Connect Ethernet 2 of the Fusion WiFi router to the switch port with VLAN 14 tagged

It’s important to note at this point that hotspot technology cannot intercept SSL traffic. If the popup window doesn’t appear, try browsing to a website that isn’t https. We suggest bbc.com, this should redirect you to log in.

Adam Troman
CEO
Adam has invented a new and very innovative platform to help businesses and customers engage with each other over a Free WiFi connection.
Adam enjoys creating synergy between businesses, consumers and technology. Adam has a very competitive attitude and a track record for successfully developing and deploying ROI driven strategies for Fusion WiFi and its clients.